

 |
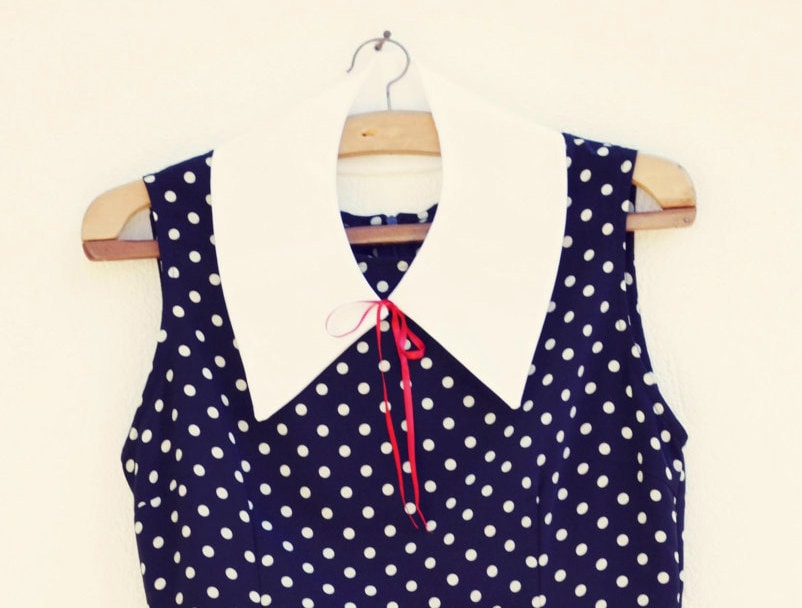
| example of pointy collar |
Last week of the sew-along! In these last few posts, we're going to see a few ways to alter the Sureau, and we're starting with a collar!
I'm going to show you how to draft a pointy (or Chelsea) collar for your dress.
I'm going to show you how to draft a pointy (or Chelsea) collar for your dress.


With a ruler, mark some dots at 6 cm (or your preferred width) and join them with the help of a French curve.


And you're done!
To construct the collar:
Cut two collar pieces on the fold of the fabric and sew along the outer edge, with right sides together.
Remember that notching the curve and pressing the collar carefully once you've turned it will make a HUGE difference on your finished result.
When you pin the collar on the neckline, the two parts will have to overlap at the center front and meet at exactly 1,5cm from the edge.
Once the collar is stitched on, you will pin and the sew the facing over it and proceed as usual.
If you want to see how to draft a peter-pan half collar, here is Eléonore's post.